Okta SSO Provisioning Setup Guide
Note: If you are using non-Okta SSO to login to Productiv, please refer to this page for SCIM provisioning setup instead.
Enable provisioning on the Productiv app in Okta so that you can provision users directly to Productiv from Okta.
Supported Features
The Okta/Productiv Provisioning integration currently supports the following features:
- Create Users
- Update User Attributes
- Deactivate Users
- Import Users
For more information, visit our Help Center.
Step 1: Setup login with Okta
To set up SSO login with Okta, please complete the steps mentioned in the Okta SSO Setup Guide
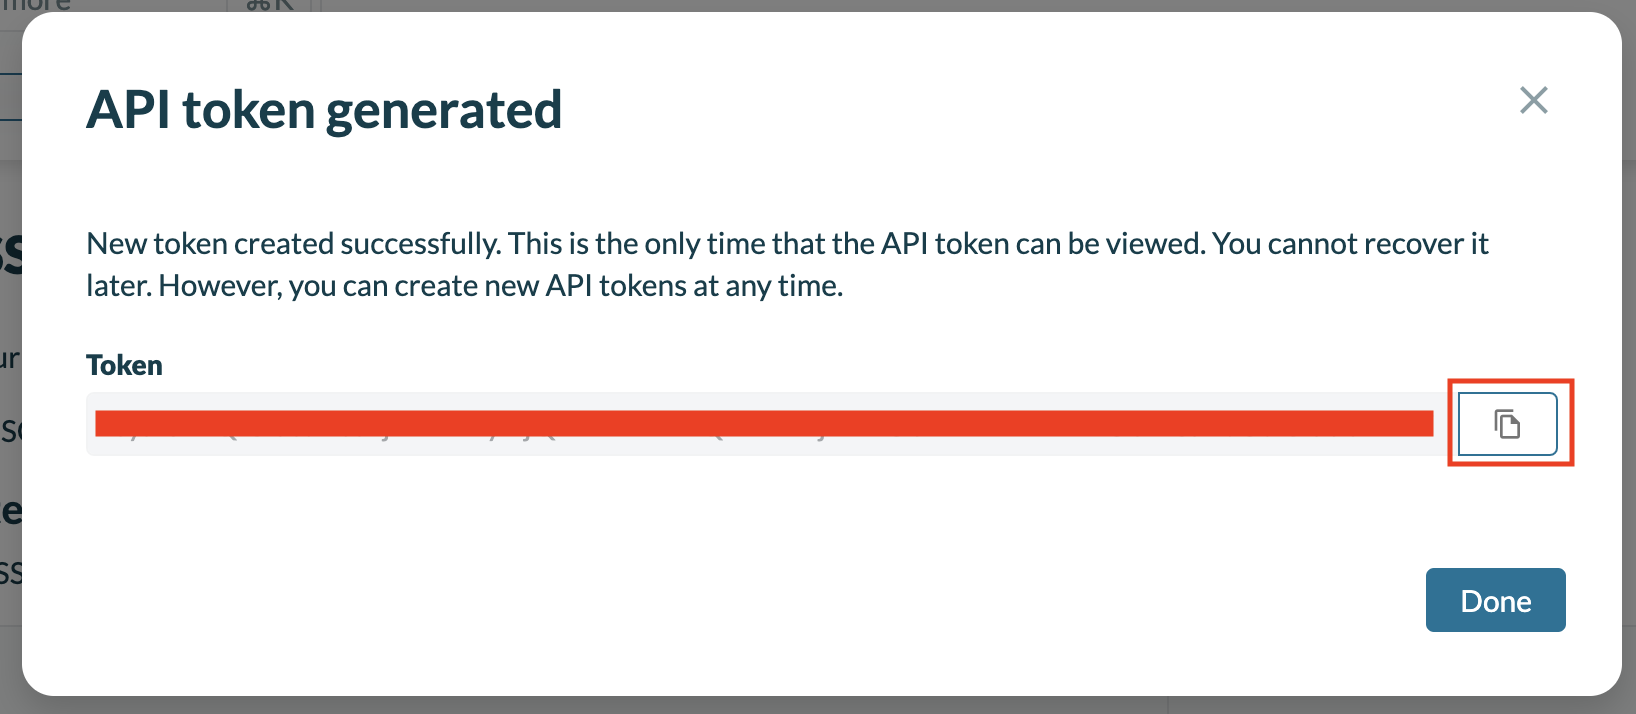
Step 2: Generate API token in Productiv
Sign on to your Productiv instance.
Go to Settings > Organization.
Scroll to the SCIM Integration section under Set up Single Sign-On (SSO) Access section and click on Generate new token.

Copy the newly generated token to be used in subsequent steps.
Step 3: Enable provisioning from Okta
Login to your Okta admin portal and navigate to the Productiv app setup for SAML.
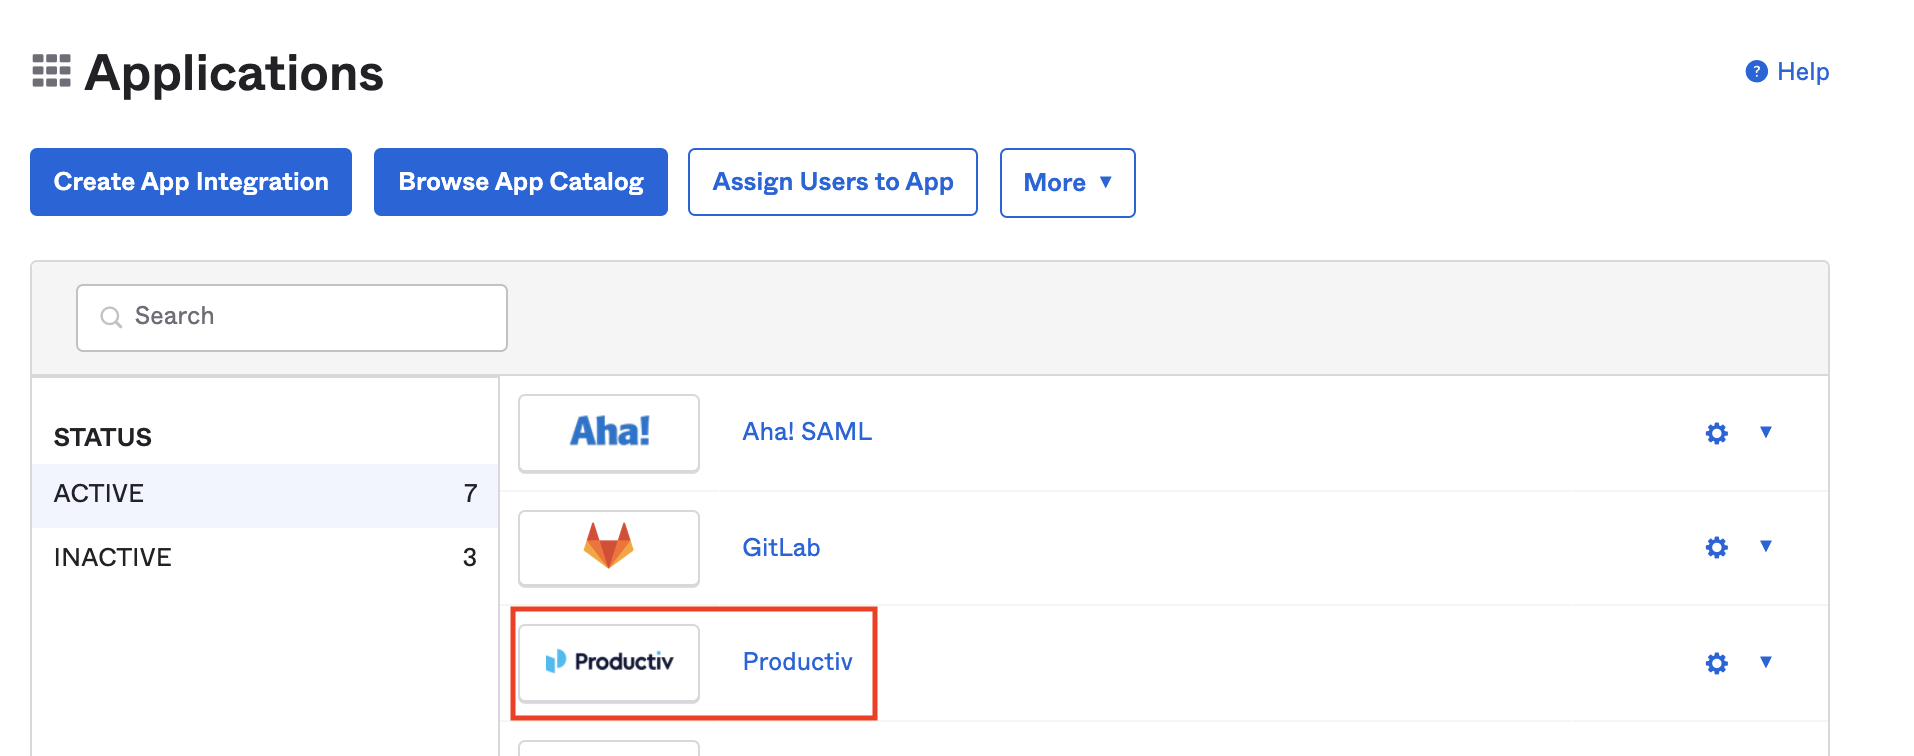
Click on the Provisioning tab and then on Integration tab.
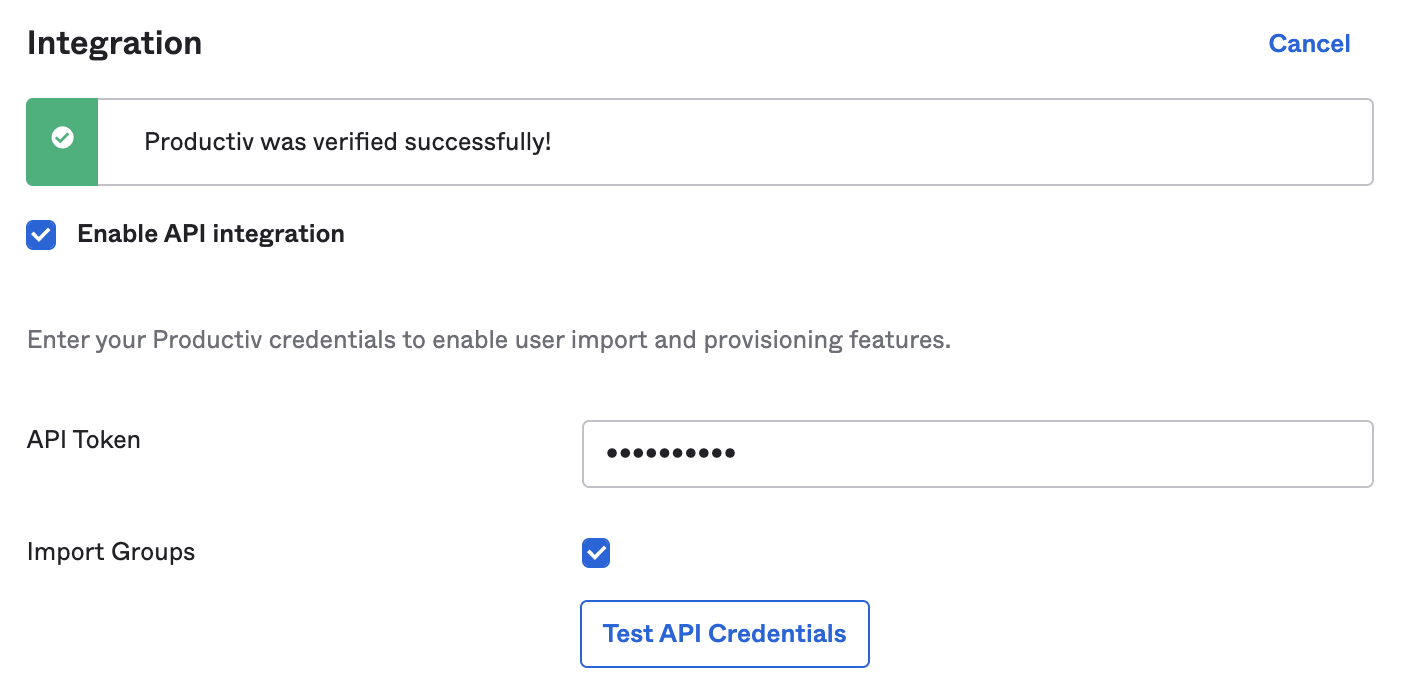
Click Configure API Integration and fill in the following information,
API Token
<API Token Copied from Step 2>
Import Groups
Unchecked
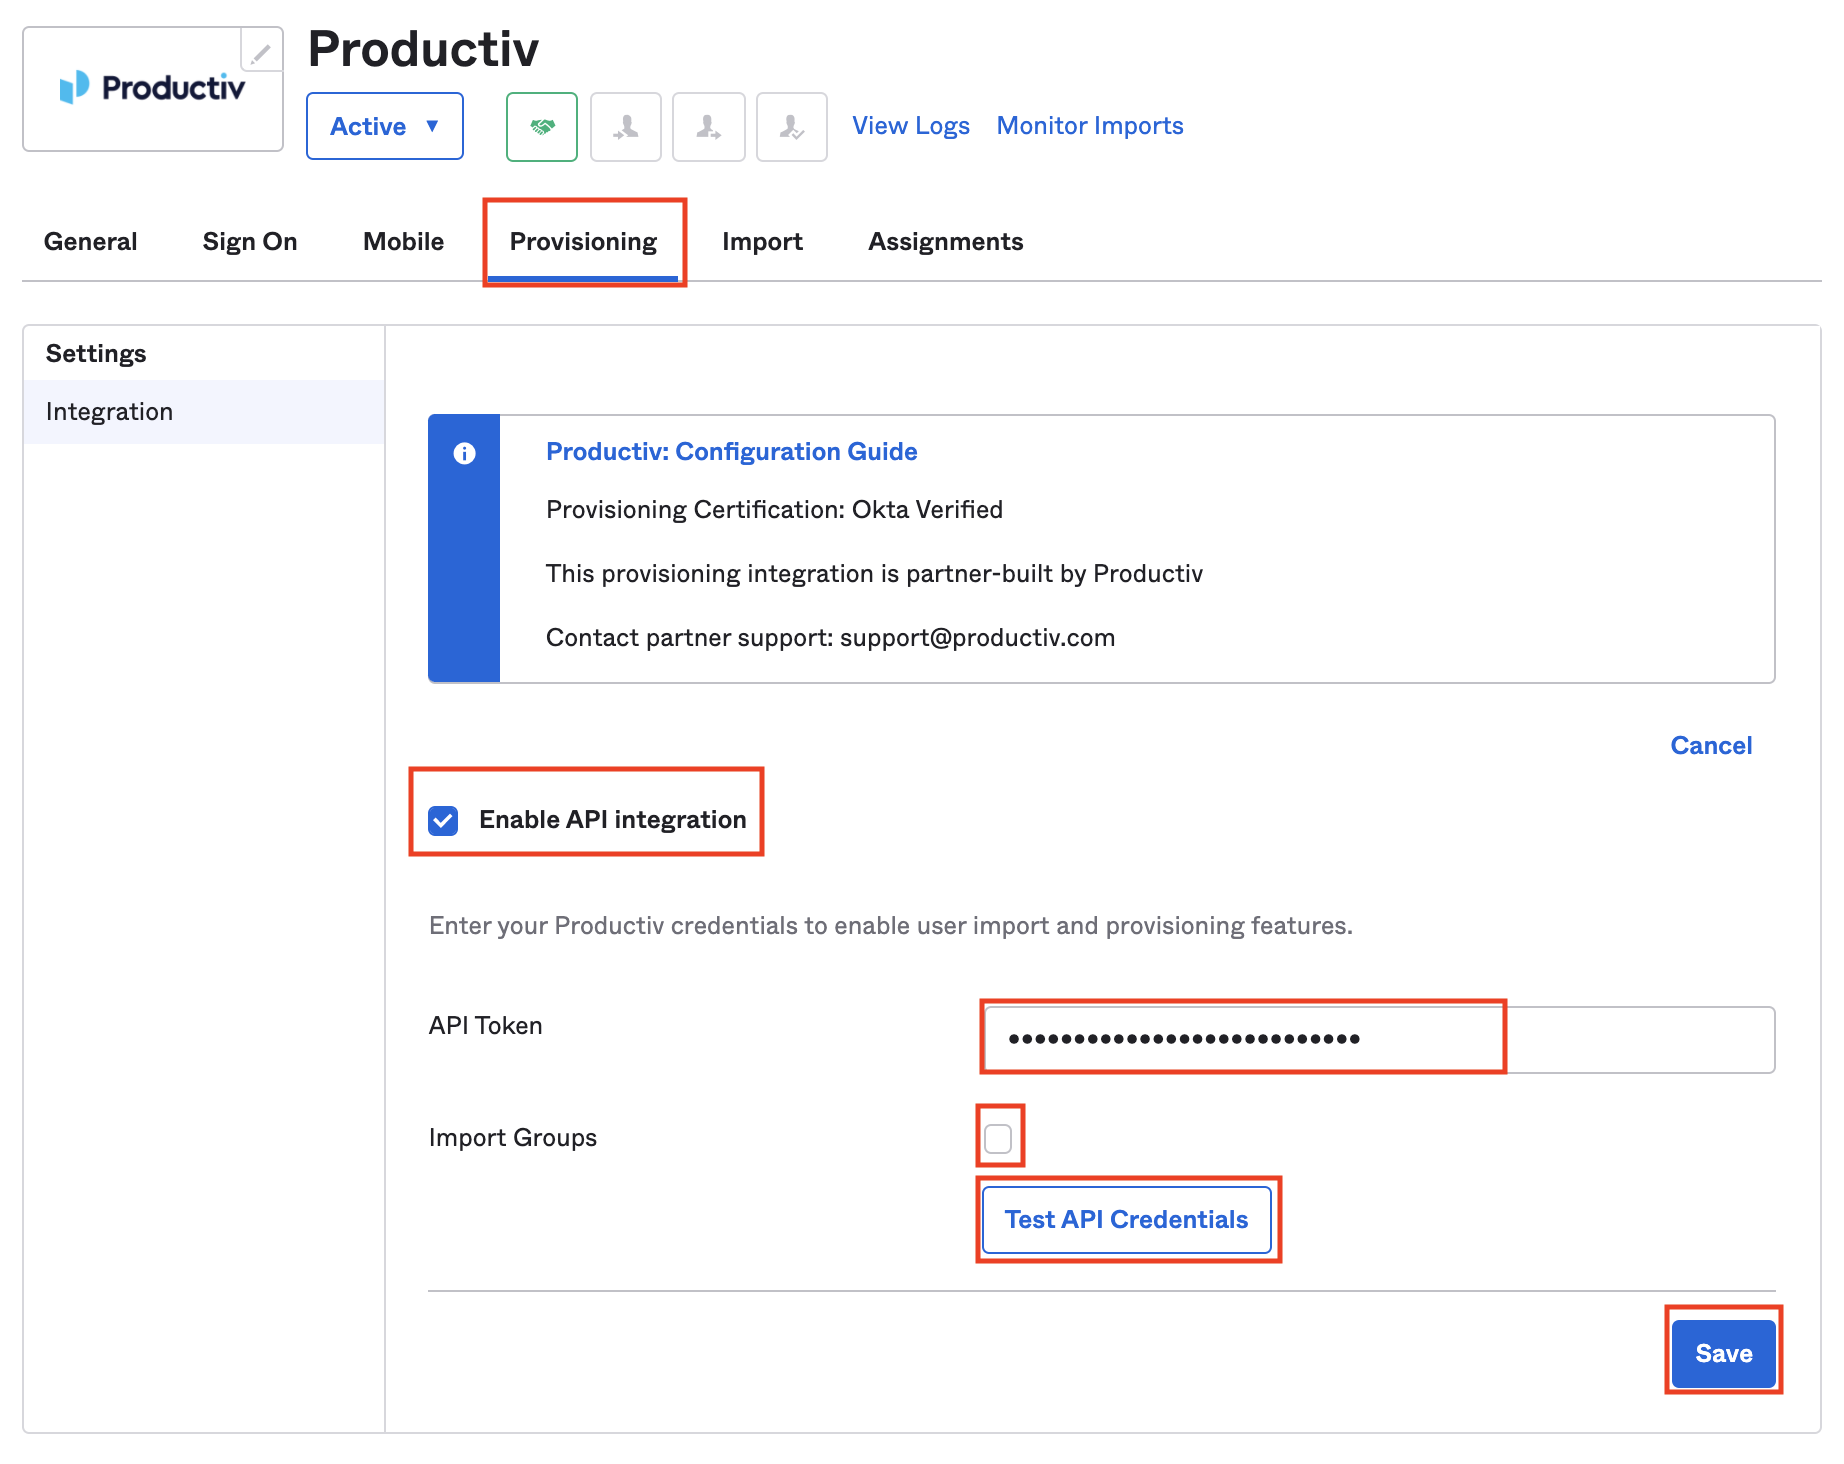
Click on Test API Credentials and then Save once it completes successfully.
Step 4: Update provisioning settings
While staying on the Provisioning tab and then on To App tab.
Enable the following settings for provision users in Productiv from Okta.
- Create Users
- Update User Attributes
- Deactivate Users

Your Productiv account should now be setup for provisioning via Okta. When a user is assigned or unassigned to the Productiv app in Okta, they will automatically get provisioned or disabled in Productiv.
Step 5: Add permissions management
While staying on the Provisioning tab and on the To App tab.
Scroll down and click on Go to Profile Editor.

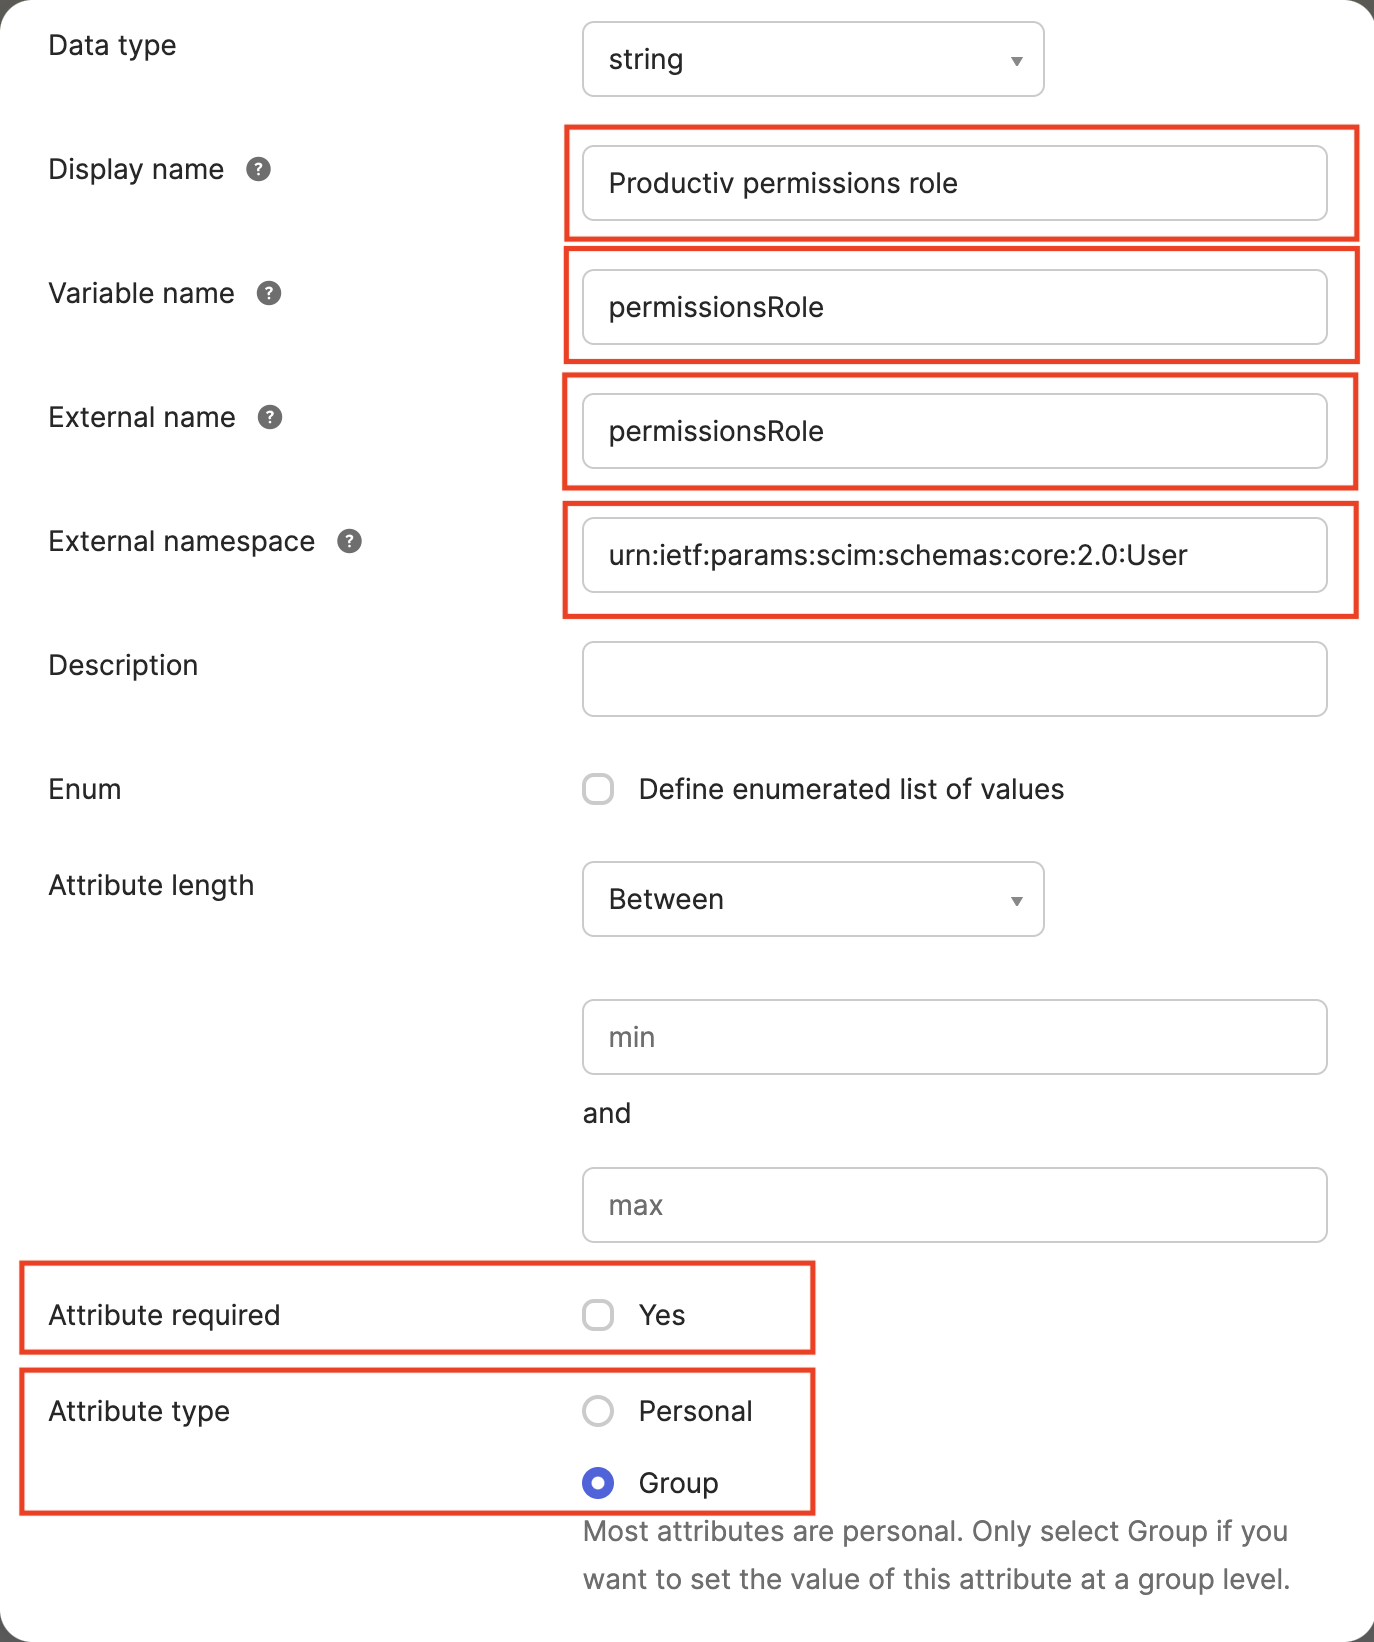
Click on Add Attribute and fill in the following fields:
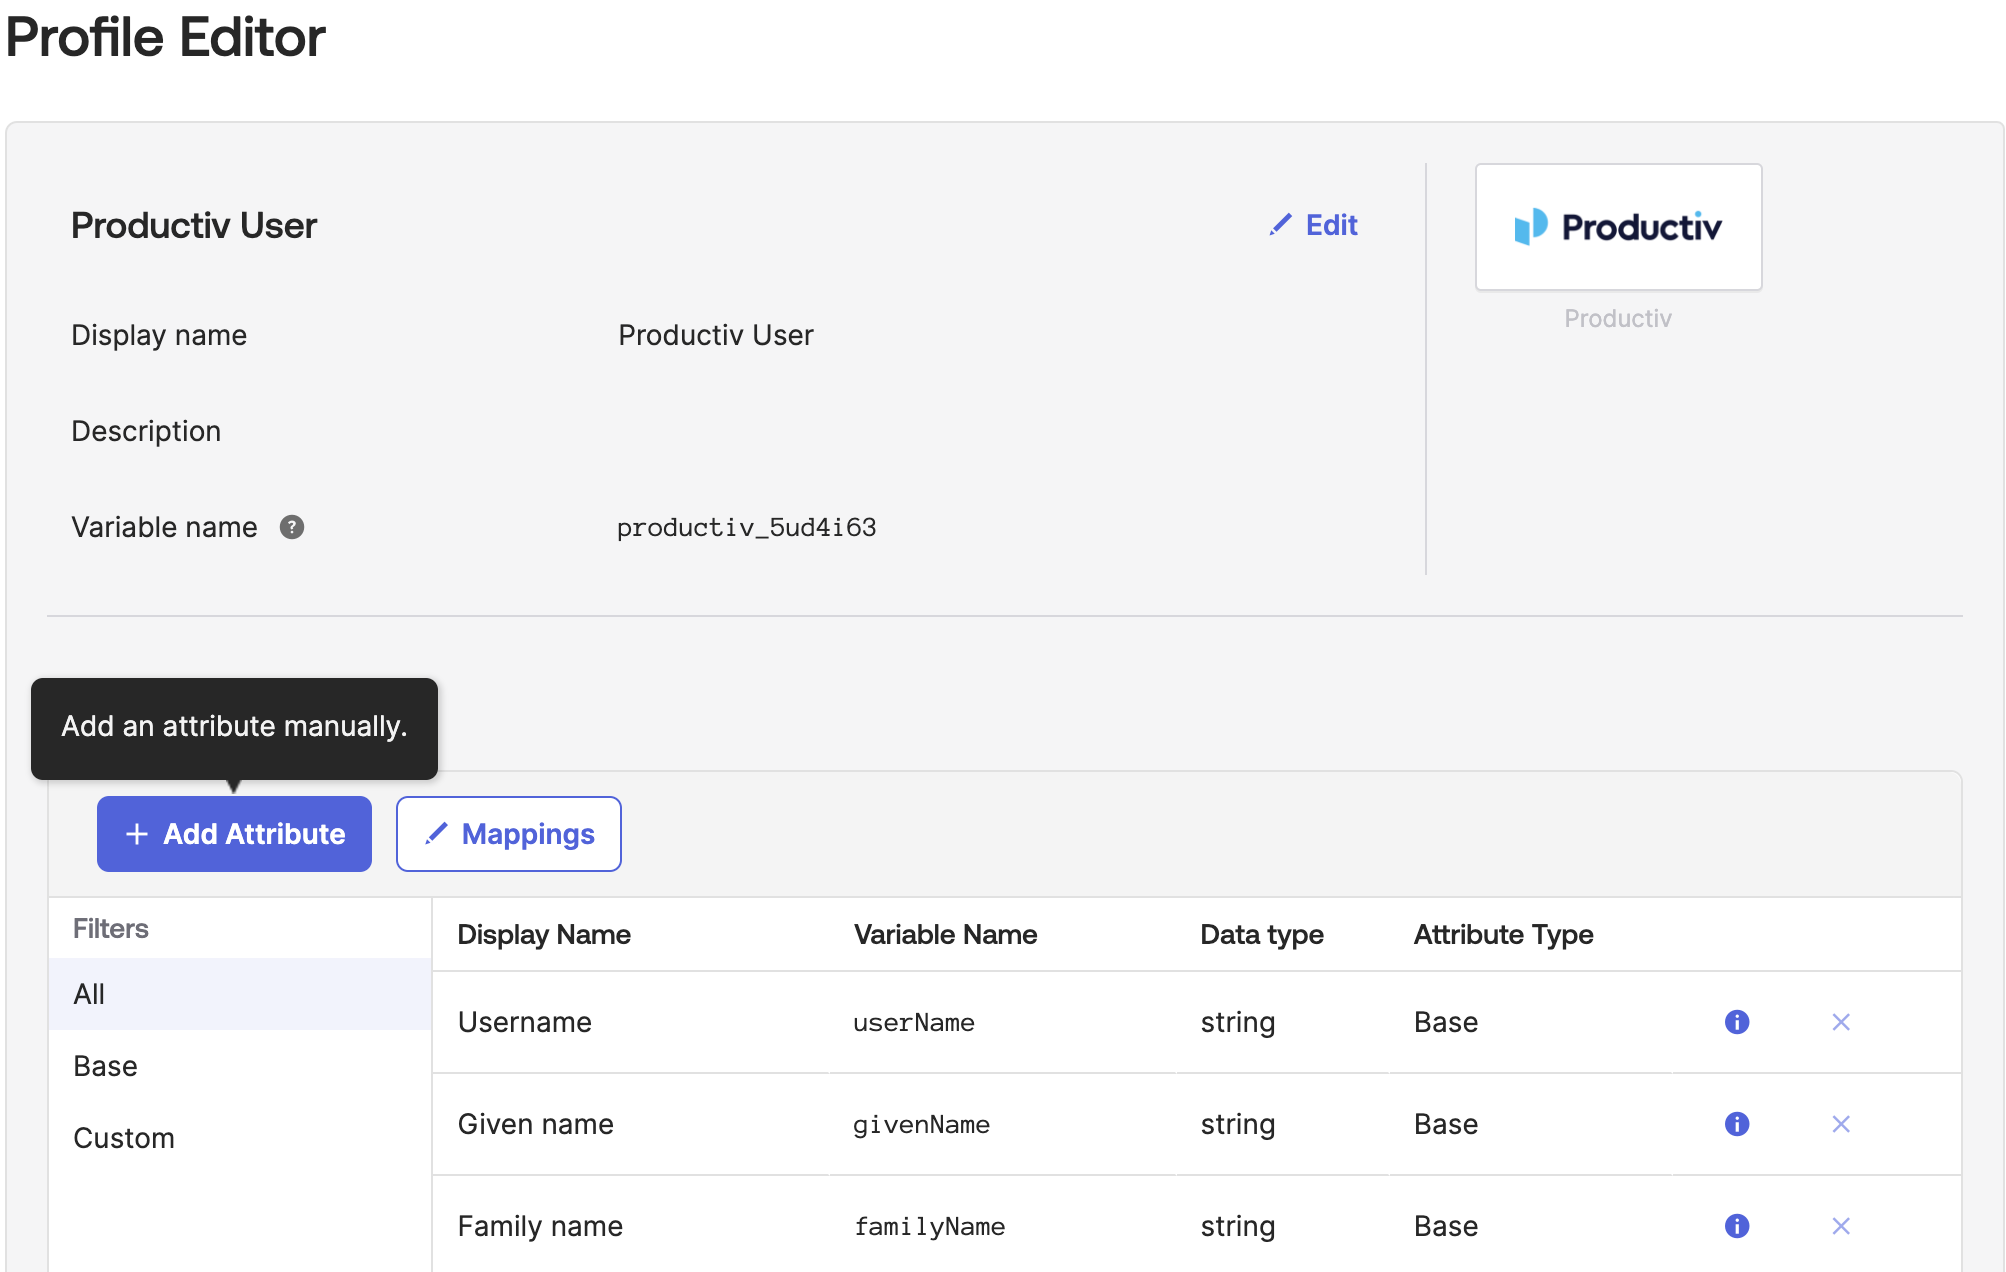
Data type
string
Display name
Productiv permission role
Variable name
permissionsRole
External name
permissionsRole
External namespace
urn:ietf:params:scim:schemas:core:2.0:User
Attribute required
unchecked
Attribute type
Group
Now when assigning Productiv to an Okta group, you will be prompted to enter a string into the Productiv permissions field.

We currently support the management of the following roles on Okta:
| Role in Productiv | String to enter into permissions field |
|---|---|
Super Admin |
super-admin |
Application Admin |
admin |
Basic User |
basic-user |
Limited Plus User |
limited-plus-user |
Limited User |
limited-user |
Appstore User |
appstore-user |
Custom role |
<Custom role ID> |
Any users provisioned to Productiv by those groups will inherit its permissions. Custom roles are used to control user permissions for app restricted roles. The custom roles and their corresponding IDs can be found in this table in Productiv:
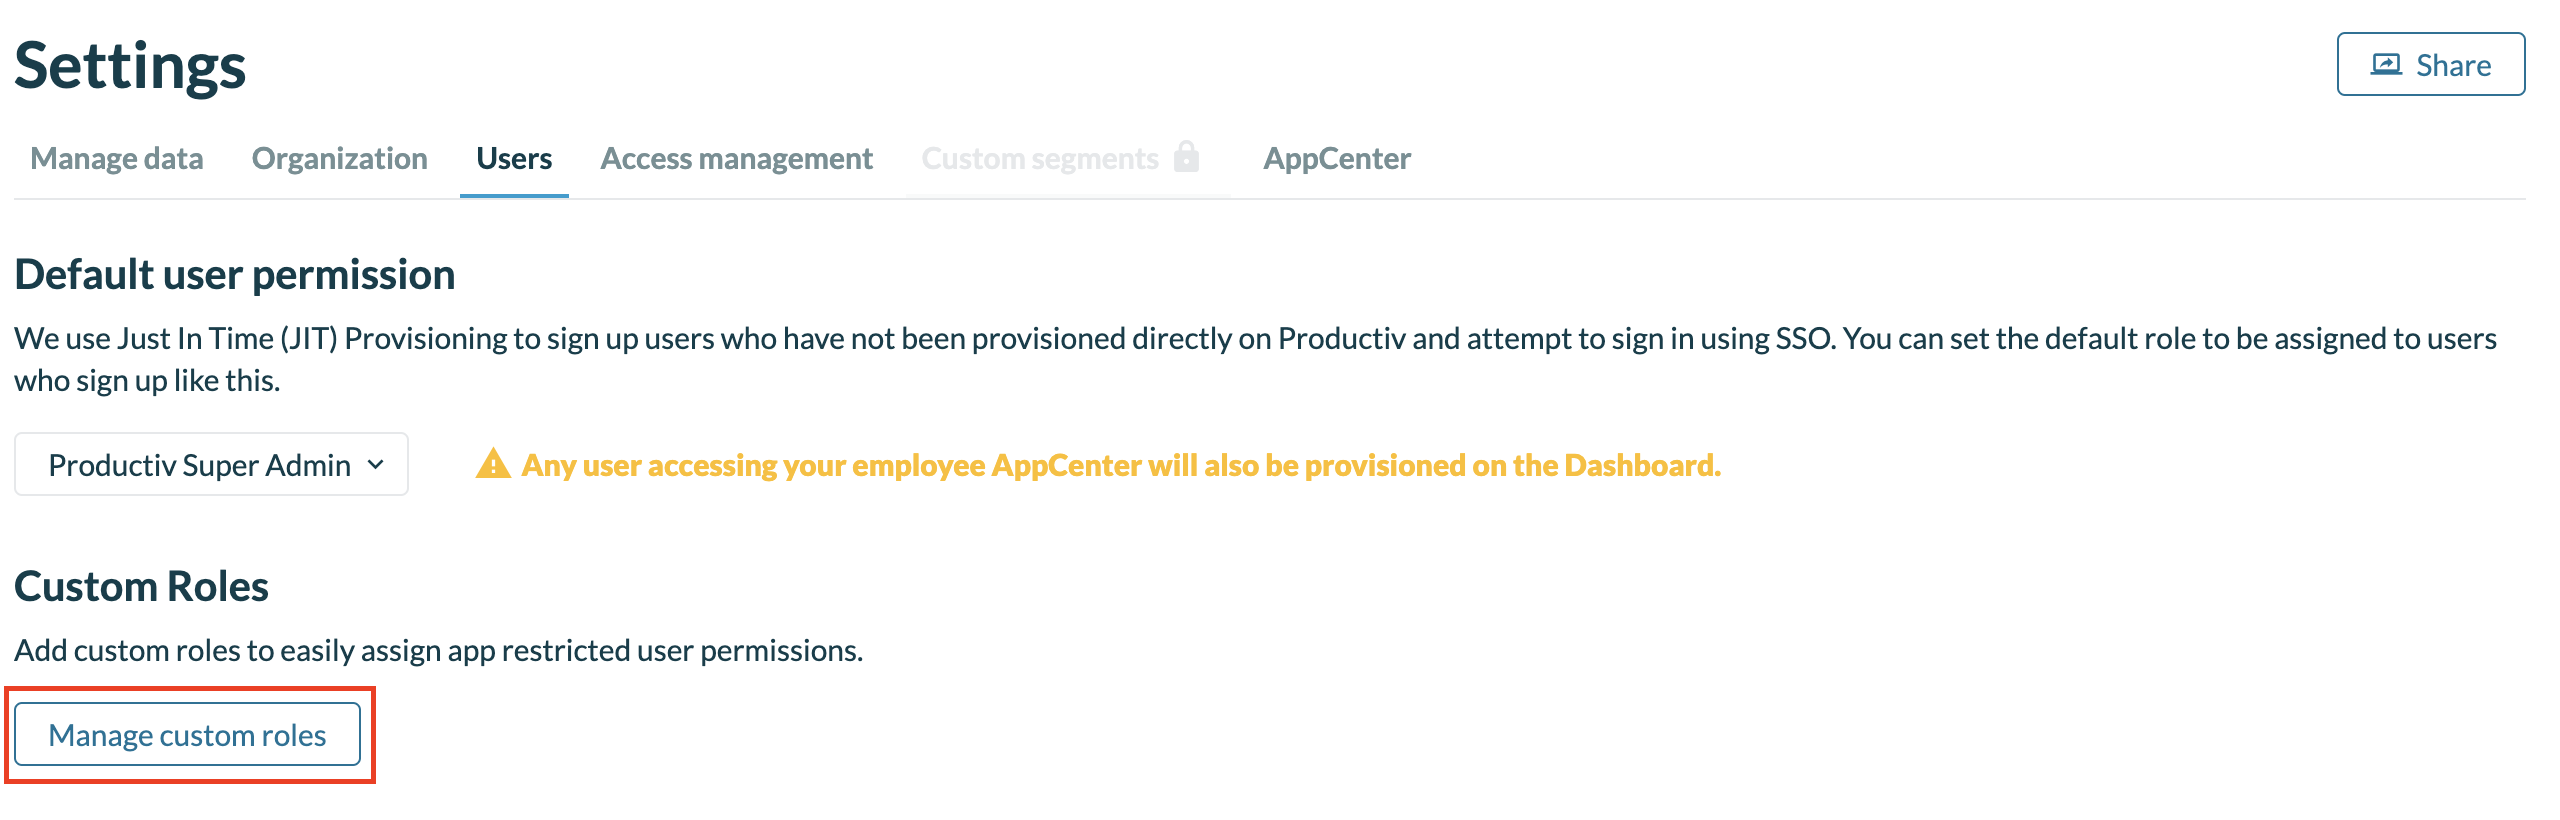
Click on Manage custom roles on the user settings page.

If a custom role ID is inputted into the permissions field, all of the corresponding users will be given that custom role's permission level and restricted apps list.
Troubleshooting
Please contact Productiv support for any issues with setting up Okta SSO Provisioning.
Users that are individually provisioned, or provisioned before the addition of the custom attribute must be converted to group assignments