Renewals Tracker
The Renewal Tracker allows you to manually manage your renewals using Renewal statuses, notes, and important metadata such as termination dates or cost savings. With Renewal tracker you are able to:
- Manage your renewals from start to finish
- Manage which contracts are a part of the renewal and edit the Renewal Group
- Understand important changes in Renewal status as the contract progresses through the renewal and capture key info such as Cost Savings
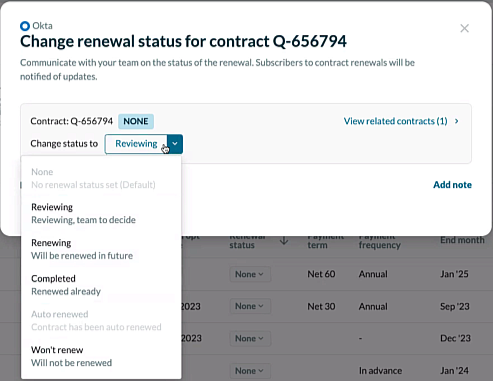
- Manage the renewal from Reviewing, to Renewing, to Completed. Also capture when you decide you Won't Renew a particular contract or renewal group
- Capture important details around the renewal process and collaborate with your colleagues easier
- Understand when Renewal status has changed and by whom
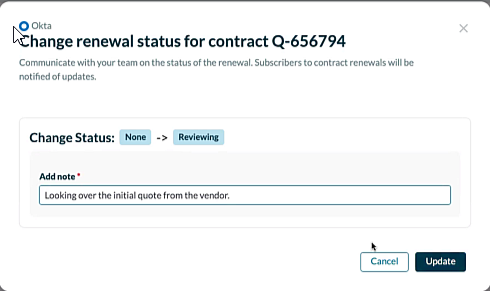
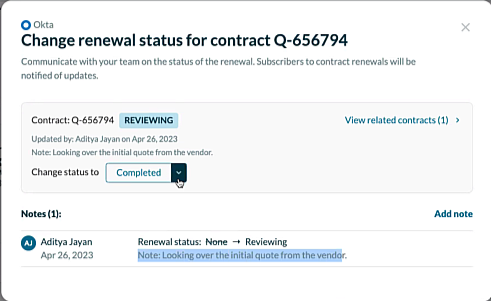
Renewal status allows you to change the renewal status of a contract, while also adding notes when you take your action. This creates an audit trail automatically. Additionally subscribers of the contract are updated immediately.
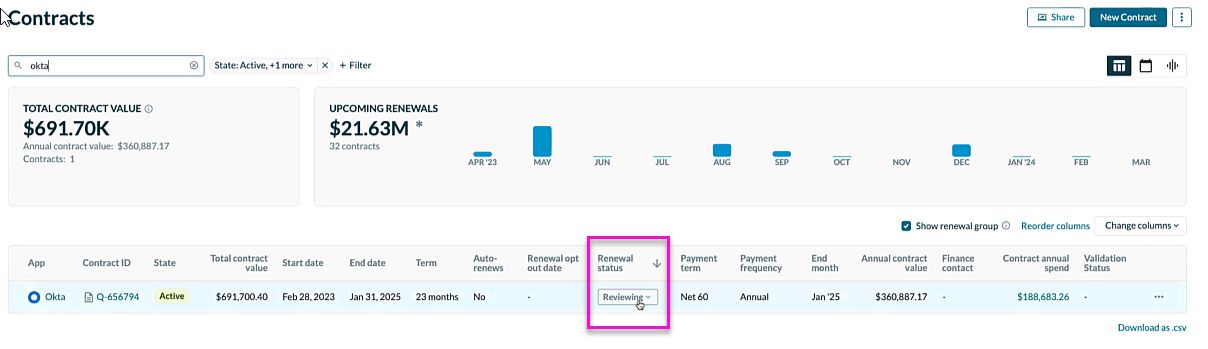
When you are on the contracts home page the default status is not set to completed, with no notes captured.
How the Renewal Tracker Works with Renewal States
The following applies to the Renewal Tracker.
- You can change states at any time
- You cannot go backwards in state if you reach a terminal state (Won’t Renew or Completed); for example, Won’t Renew then Renewing
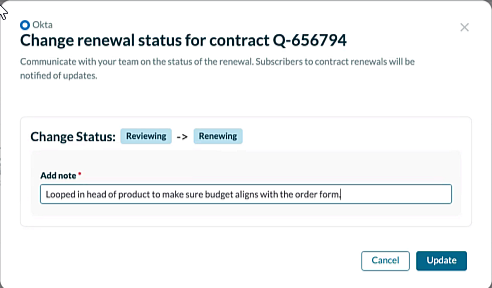
- If you change a state, you will be required to leave a note capturing what happened as this helps collaboration
- In terminal states (Completed & Won't Renew) you can also capture the termination date of the existing contract, the new contract or application status, and the cost savings
- At any point you can also just leave a note

To launch the Renewal tracker, click on a status within the Renewal Status column.

Changing State (Not Completed or Won’t Renew)

Renewing Steps

Won’t Renew and Completed Steps
Won’t Renew and Completed Steps are considered terminal states.
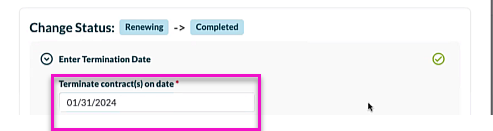
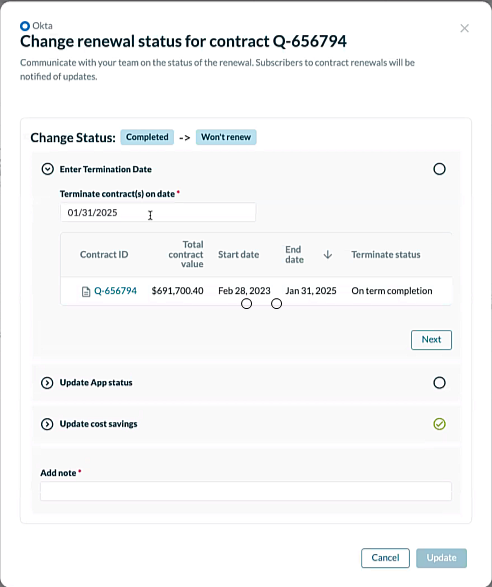
Step 1: Termination
When you mark a contract as “Completed” or “Won’t Renew” then you are able to specify a date (default is the earliest end date for contract(s) selected) for when the current contracts will end/terminate.
- On Term Completion: If the date is on or after the end date of the contract(s) then the contract(s) is ended and auto-renewal turned off
- Terminate: If the date is in the middle of the contract(s)’s term then end the contract(s) on the date supplied, mark the contract(s) as statuses terminated and the date of termination as a tooltip the the contract(s) term/annual spend is pro-rated and auto-renewal turned off
- Canceled: If the date is before the start date of the contract(s), end the contract(s) immediately, the contract(s) status is marked as canceled and the contract term & annual spend value is marked as zero
On Term Completion example.

Terminated example.

Canceled example.

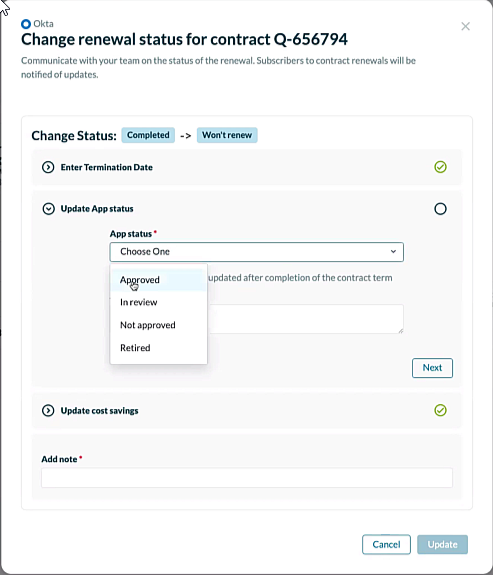
Step 2: Upload Contract or App Status
If you select Completed you have an option to upload an attachment while if you select Won’t Renew you have the option to set the App Status.
Uploading Contracts
Uploading contracts allows you to replace your existing contract when you are marking a contract as Completed. You are then able to estimate cost savings based on the new information. This step is optional, but recommended.

You are able to browse from the uploaded files, so if you have a CLM or other connected repository this is the best way to upload the resulting contract. Once a file is uploaded and has been submitted you must go to the contract processing page if you need to remove the file. You cannot remove it from the modal. You can also manually upload a contract PDF here.
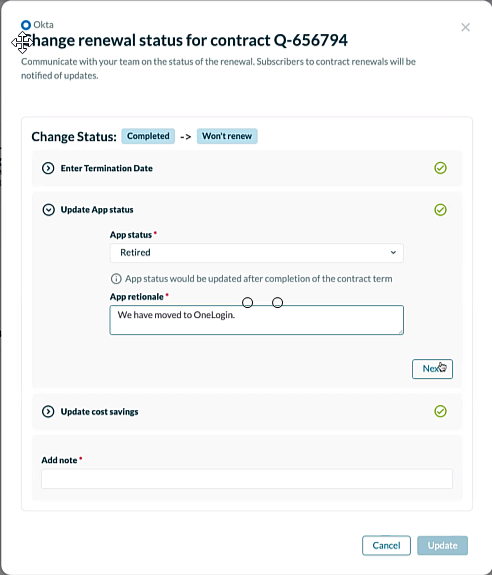
App Status
By default this is always set to Retired, but the user can set it as they wish. The app rationale is recorded on the app level. This step is not reversible and the app status will need to be changed manually from the App Details page if need be.

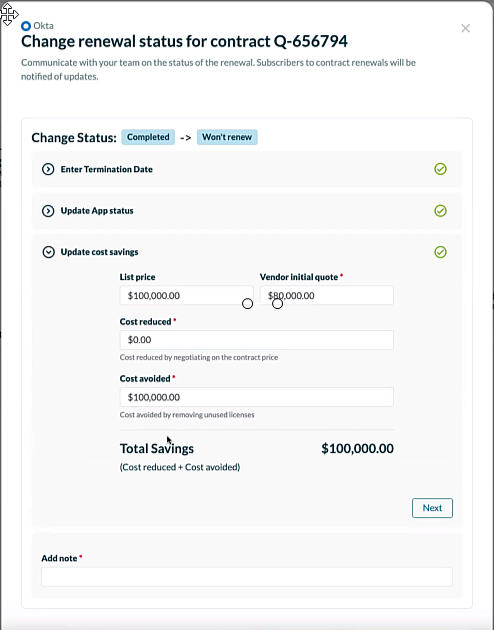
Step 3: Cost Savings
When you change the status to completed or won’t renew you have the opportunity to capture the cost savings. Cost savings is a combination of cost reduced and cost avoided. This is a free text field that will support amounts in your default currency.

Switching Between Terminal States:
The follow rules apply for switching between terminal states:
- If you change from Won’t Renew to Completed the App Status will need to be manually changed if it was set during the “Won’t Renew” step.
- If you change from Completed to Won’t Renew any contracts uploaded in the “Completed” step will need to be deleted separately on the uploaded contracts page.
Grouping Related Contracts
Some contracts, as applicable, show links to other contracts that can be renewed as well as the contract you select. Renewal status suggests other contracts for renewing in the same renewal status workflow and shows other contracts that can be selectable that are not in the current group.
To group contracts, do the following:
- Click on a status within the Renewal Status column.
The Renewal tracker appears. Related contract found information appears in orange. It can also be found in the “View Related Contracts”


- Click View contracts.
The contract information appears. Any contracts shown here have a Renewal status of None and contracts that are in an active or future state.
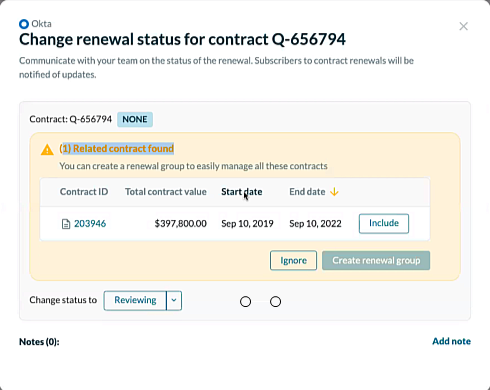
- Click Include.


- Click Create renewal group.

This treats the multiple contracts as a single group. You can always edit the grouping by clicking on the “Modify Renewal Group” tab at the top.
Example - Creating Cost Savings at status Complete.
This example shows the core concepts of adding notes, the audit trail and cost savings.
- Click on a status within the Renewal Status column.
- Select Reviewing.
- Add a note.
The Renewal status column updates.
- Click on a status within the Renewal Status column.
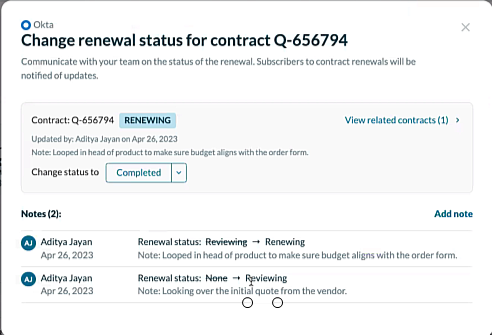
Notice how your previous note appears in the audit trail.
- Select Renewing.

- Add a note and click Update.
The Renewal status updates.

- Click on a status within the Renewal Status column and select Completed.
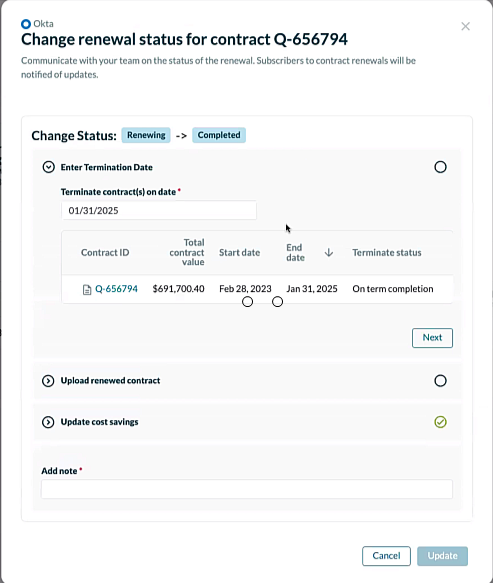
- Edit the Terminate contract(s) on date.
- Click Next.
The Upload renewed contract accordion expands.
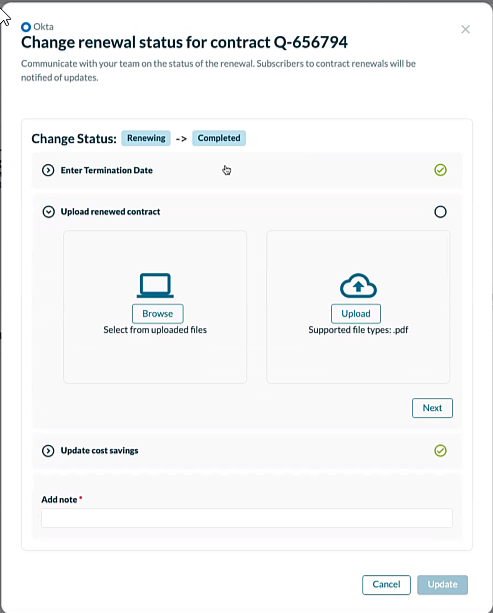
- Upload a new contract, if applicable.
- Click Next.
The Update cost savings accordion expands. - Input the applicable information.
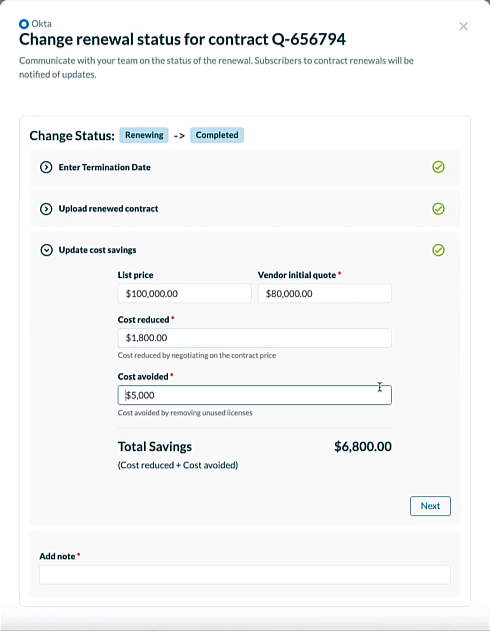
- Click Next.
- Add a note and click Update.
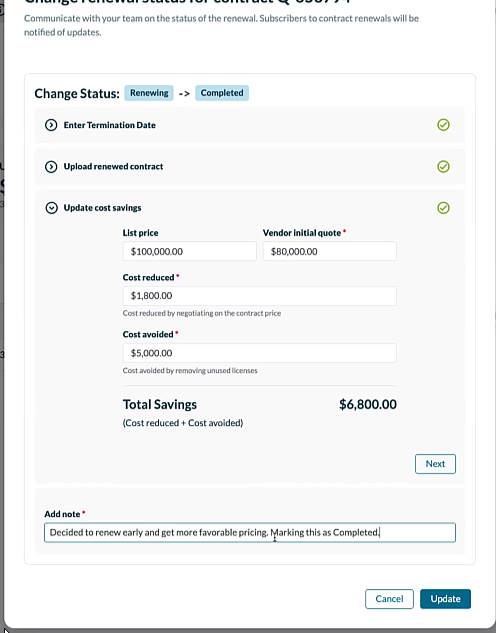
The Renewal status updates.
 .
. - Click on a status within the Renewal Status column.
The update information appears.


 .
.
Example - Won’t Renew Your Contract
- Click on a status within the Renewal Status column.
- Select Won’t renew from the drop down menu.
A warning message appears.
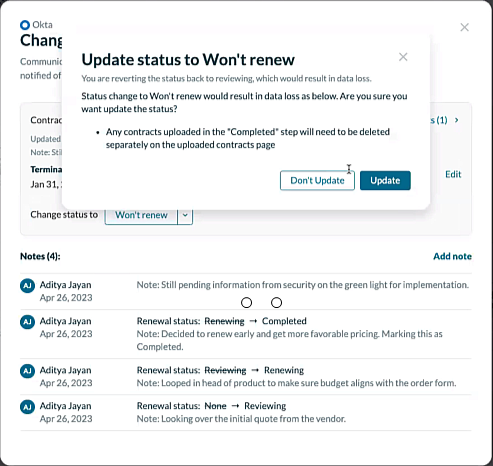
- Click Update.
The Change renewal status modal appears.
- Update App Status
- Update the App Rationale.
- Click Next.
- Update the cost savings.
In this instance it is the total cost of the contract.
- Click Next.
- Add a note.
- Click Update


