Send emails from a preferred email address for provisioning workflow notifications
Provisioning workflows include email notifications that are sent by Productiv. You can specify a sender address so that the email comes from your domain instead of Productiv.
Make sure to choose a company email address that is monitored and that users can reply to.
To indicate the preferred ‘from’ address for provisioning notifications, complete the following steps:
-
Select the Settings icon in the left navigation list.
-
Select the Organization tab.
-
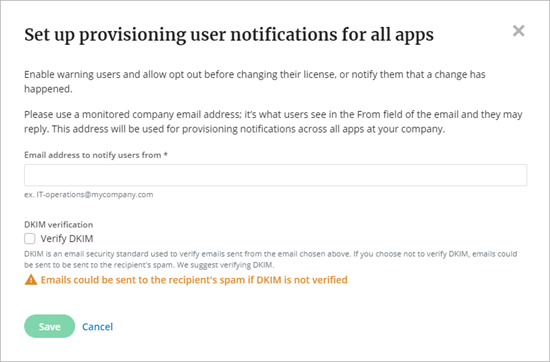
Under Provisioning notifications, select Set up provisioning user notifications. Or to change the address, select Edit.
-
In the Set up provisioning user notification for all apps popup, enter the email address to show as the sender for notification emails.
-
Check the Verify DKIM box to begin the process of ensuring notifications Productiv sends on your behalf don’t get sent to spam folders. The Verification Sent confirmation will include three CNAME records that you’ll need to add to your DNS settings to complete this process. Read Setting up DKIM for user notification emails to learn more.
-
Select Save.
While waiting for email and/or DKIM verification, the Organization page displays a warning to indicate the status of your verification.

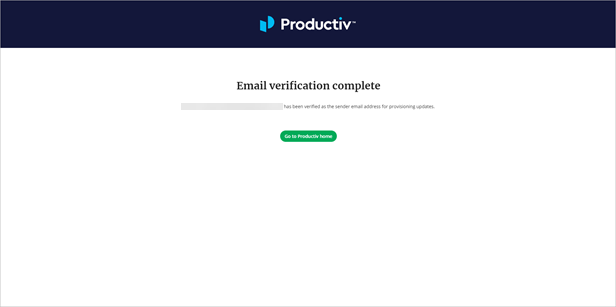
Look for an email from Productiv to Verify your email address. To complete the email address verification, select the verification link in the email you received to confirm it. Productiv displays a confirmation.
Notifications will be sent according to how they are defined in the provisioning workflows for each app.
Contact your CSM if you’d like to customize the text in the email template used for notifications.
Comments
0 comments
Article is closed for comments.