Bulk uploading app contacts
This article describes how Productiv super admins can use the Productiv Bulk Edit wizard to add, update, or delete several app contacts at a time, and notes some strategies to ensure that your information is complete.
For a complete list of actions Productiv super admins can take, see User roles and permissions.
If you are a Productiv super admin who needs to designate multiple app contacts for several apps, you can use the Bulk edit app contacts wizard to import them to Productiv in a single upload. Users added to Productiv as app contacts are automatically:
- provisioned to Productiv if necessary
- listed as App contacts on the app’s Overview page
- subscribed to notifications for apps for the relevant apps
Process summary
1. Navigate to the importing app contacts wizard
2. Download the current app contact .csv
3. Modify the .csv file as desired
4. Upload the edited .csv template
5. If necessary, resolve unmapped apps
1. Navigate to the importing app contacts wizard
- In the navigation pane, click Settings. Productiv displays the Settings page.
- Click the Users tab. Productiv displays the Users sub-page.
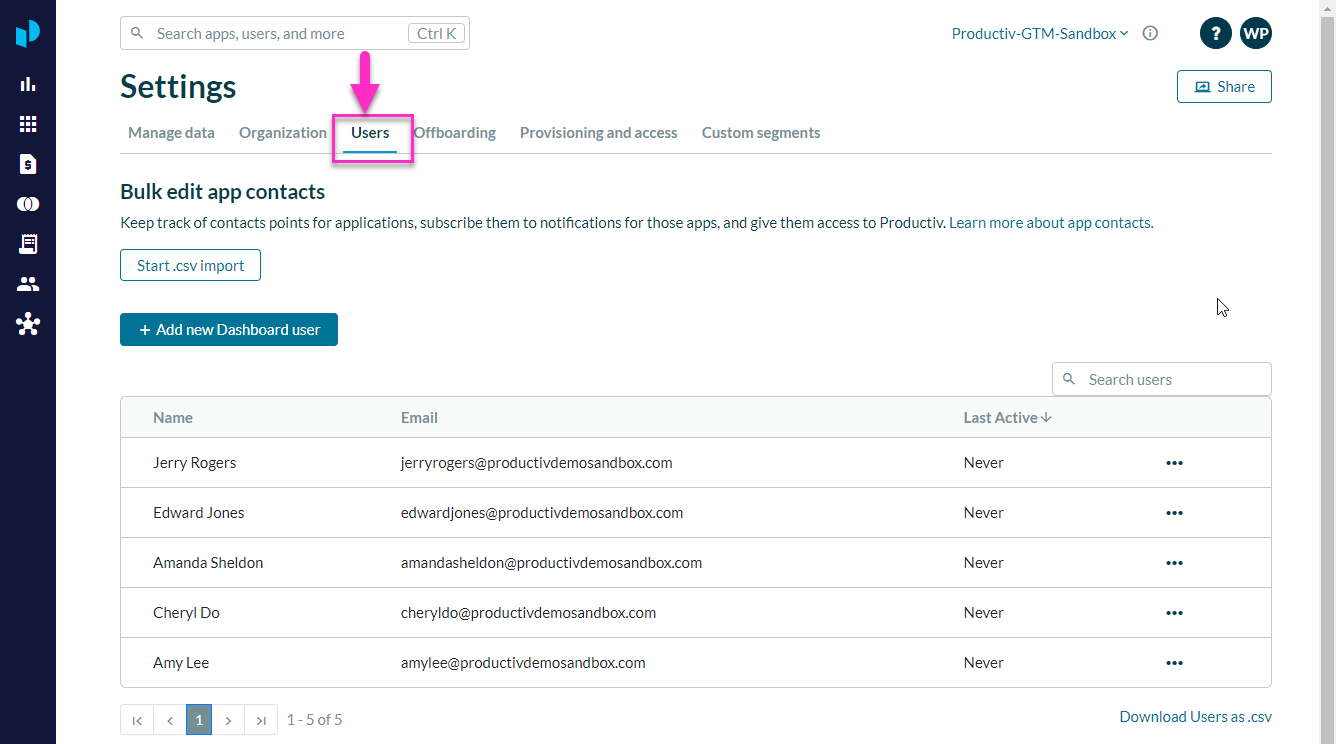
- In the Bulk edit app contacts section, click Start .csv import.
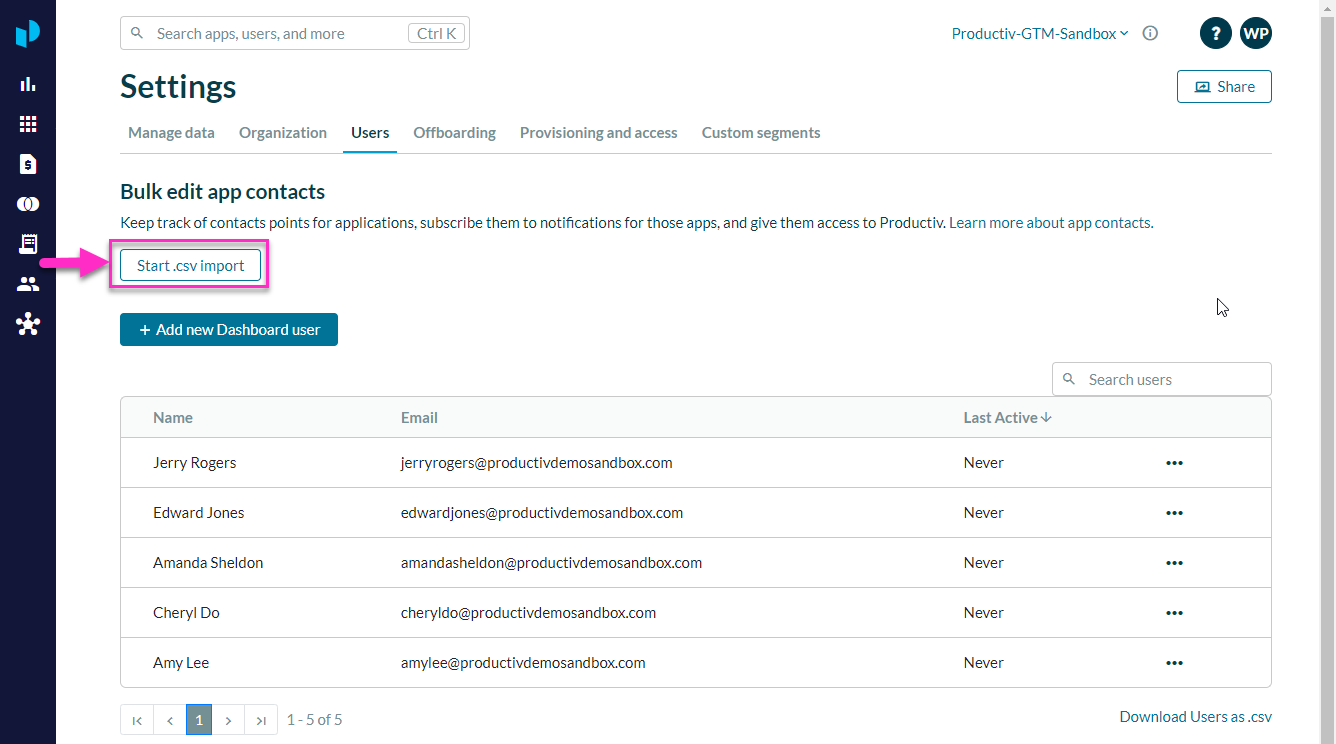
Productiv displays page 1 of the Importing app contacts wizard.
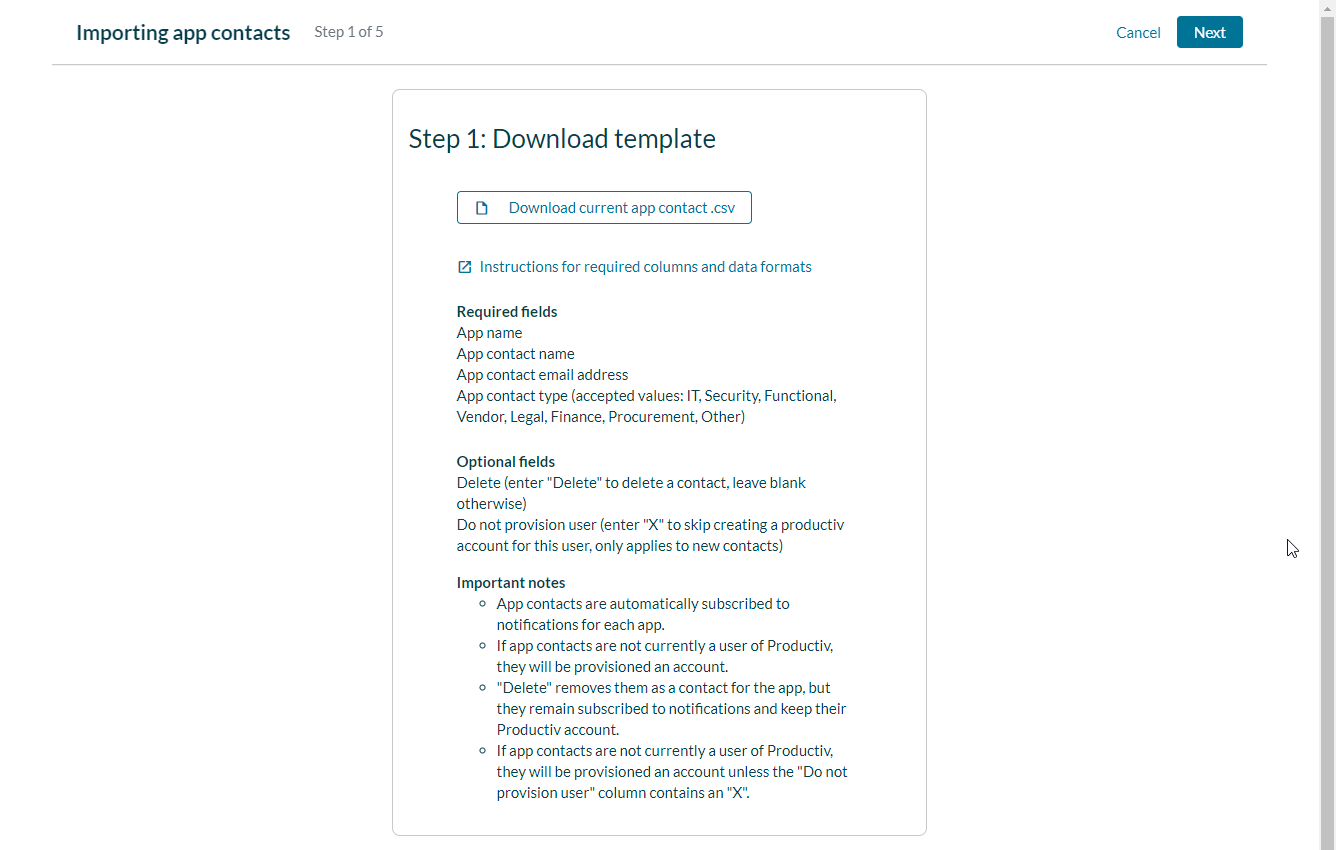


2. Download the current app contact .csv
To obtain the appropriate .csv template, click the Download button.
If you don’t yet have any app contacts configured, the button text is Download blank app contact .csv.
If there are already some app contacts recorded for your site, the button text is Download current app contact .csv.
Productiv downloads a .csv file named either Productiv_app_contacts (a blank .csv template) or Productiv_current_app_contacts (with listings for all app contacts that have been uploaded thus far).
3. Modify the .csv file as desired
Follow the instructions onscreen to add new app contacts, modify existing app contacts (if already present in the .csv file), or delete app contacts.
To add app contacts, be sure to include the following information for each user:
- App name -- the name of the app whose app contact you want to specify or edit
- App contact name -- the first and last name of the designated app contact
- App contact email address -- the email address of the designated app contact
- App contact type -- valid entries include Finance, Functional, IT, Legal or Security, Procurement, Vendor or Other
- Adding a user with the contact type Vendor or Other does not provision them within Productiv or subscribe them to email notifications.

To remove an existing app contact, do not delete the entry for that user. Instead, go to the entry for that app contact and enter Delete in the Delete column for that contact. Note that the deleted app contact will still remain subscribed to notifications for the app.
IMPORTANT: The Delete column data field should always either be blank (if you do not want to remove that row) or be populated with the word "delete" (if you do want to remove that row). For all other data fields, the field must never be left blank. If an optional field that has no value, mark it with a dash.
Once your edits are complete save the file as a .csv file.
Then click Next, in the upper right corner of the wizard page.
Productiv displays page 2 of the Importing app contacts wizard.
4. Upload the edited .csv template
Bulk uploads of app contacts overwrite your existing app contacts, adding new app contacts, updating existing app contacts, and removing any contact who was flagged as Delete. (The contacts to remove are not yet deleted at this point. See 6. Review contacts to delete.)
To upload the prepared .csv file:
- Return to the Productiv Importing app contacts Step 2 page.

- Select I understand that this will update current data.
- Click Upload app contacts.
- Select the file you prepared.
When the file has been accepted, Productiv displays a confirmation message that reminds you that current app contacts will be changed. - Confirm your changes.
- Click Next.

Productiv displays page 3 of the Importing app contacts wizard.
5. If necessary, resolve unmapped apps
If you have app names in your .csv file that don’t exactly map to your app portfolio, Productiv displays the Resolve unmapped apps page. To resolve these, search for the app name for each listing and select the appropriate app for the listed app contact.
Note: If you do not resolve the app names for the new contacts in your .csv file, Productiv will not display the new contact.
When you have resolved all app names, click Next.
Productiv displays page 4 of the Importing app contacts wizard.
6. Review user permissions
The fourth page of the wizard lists existing Productiv users and their current permissions. The Contact for apps column shows the apps for which each user will be listed as an app contact.

When you are finished with your review, select Next.
Productiv displays page 5 of the Importing app contacts wizard.
7. Review contacts to delete
Any contacts flagged as Delete in the upload are listed with their name and email and the app from which they are being removed as an app contact.

Review your changes. When you are satisfied that they are correct, click Finish importing.
Productiv inputs the changes you just approved, and navigates you back to the Users sub-page.
8. Review updated users
The Users sub-page displays how many rows were successfully processed.

If you see a total that is less than the number of app contacts you tried to upload, it may be that those apps from the uploaded .csv file cannot be matched. Thus, those app contacts were not ingested.